
Solar Monitor Setup
Solar Monitor is an open-source monitoring service for the EG4 6000XP. It communicates with the inverter over Modbus RTU using an RS485 connection, serves a browser-based dashboard, and supports configurable settings and notifications.
I run it on a Raspberry Pi 4 mounted next to the inverter. This guide walks through the complete setup: wiring the USB-to-RS485 adapter, connecting it to the inverter, installing the service, adding the device, and configuring notifications.
The project is open source under GPLv3 and available at github.com/circuitdojo/solar-monitor.
What you’ll need
- EG4 6000XP
- Raspberry Pi 4 (the system used in this guide)
- Waveshare USB to RS485 converter (Amazon link)
- Cat5e or Cat6 cable + RJ45 connectors
- RJ45 crimping tool (Klein Tools VDV226-110 or similar)
Hookup Guide
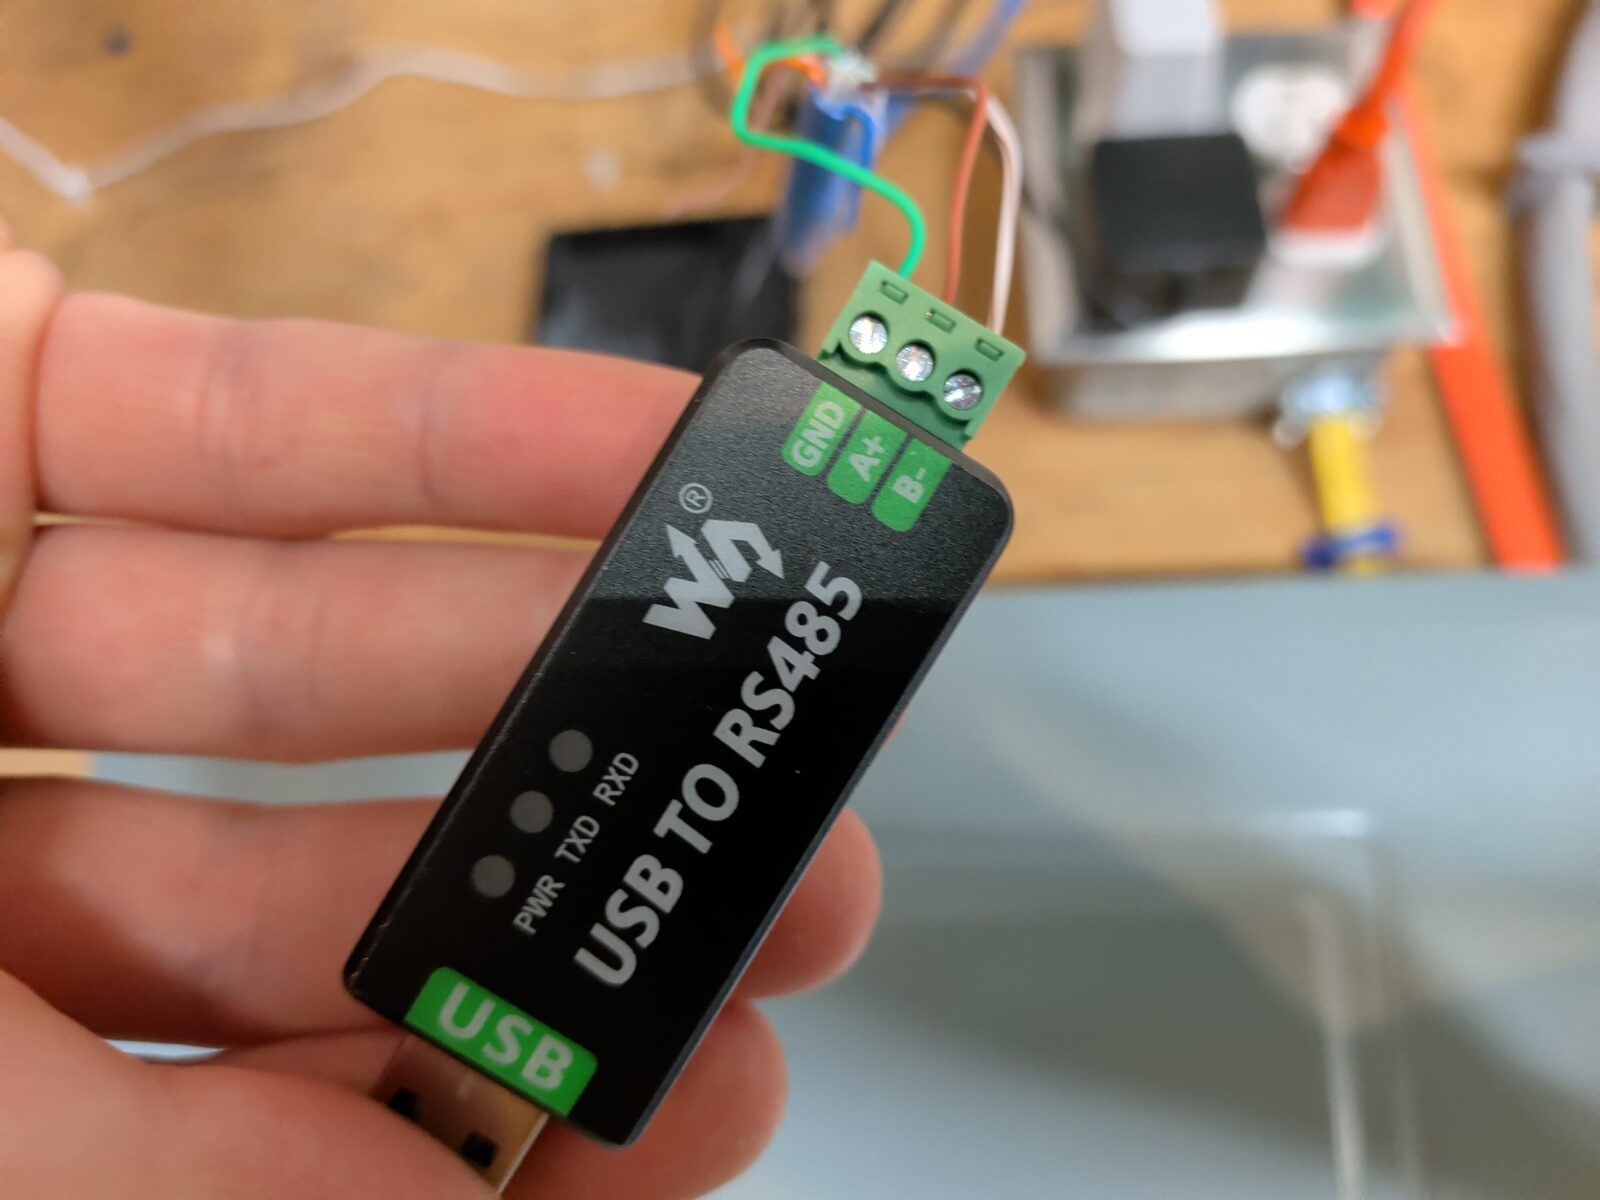
The RS485 connection between your Pi and the inverter uses three wires. The Waveshare USB adapter exposes them as a screw terminal:
| Adapter terminal | Wire (T568B) |
|---|---|
| B- | Brown/White |
| A+ | Brown |
| GND | Green |
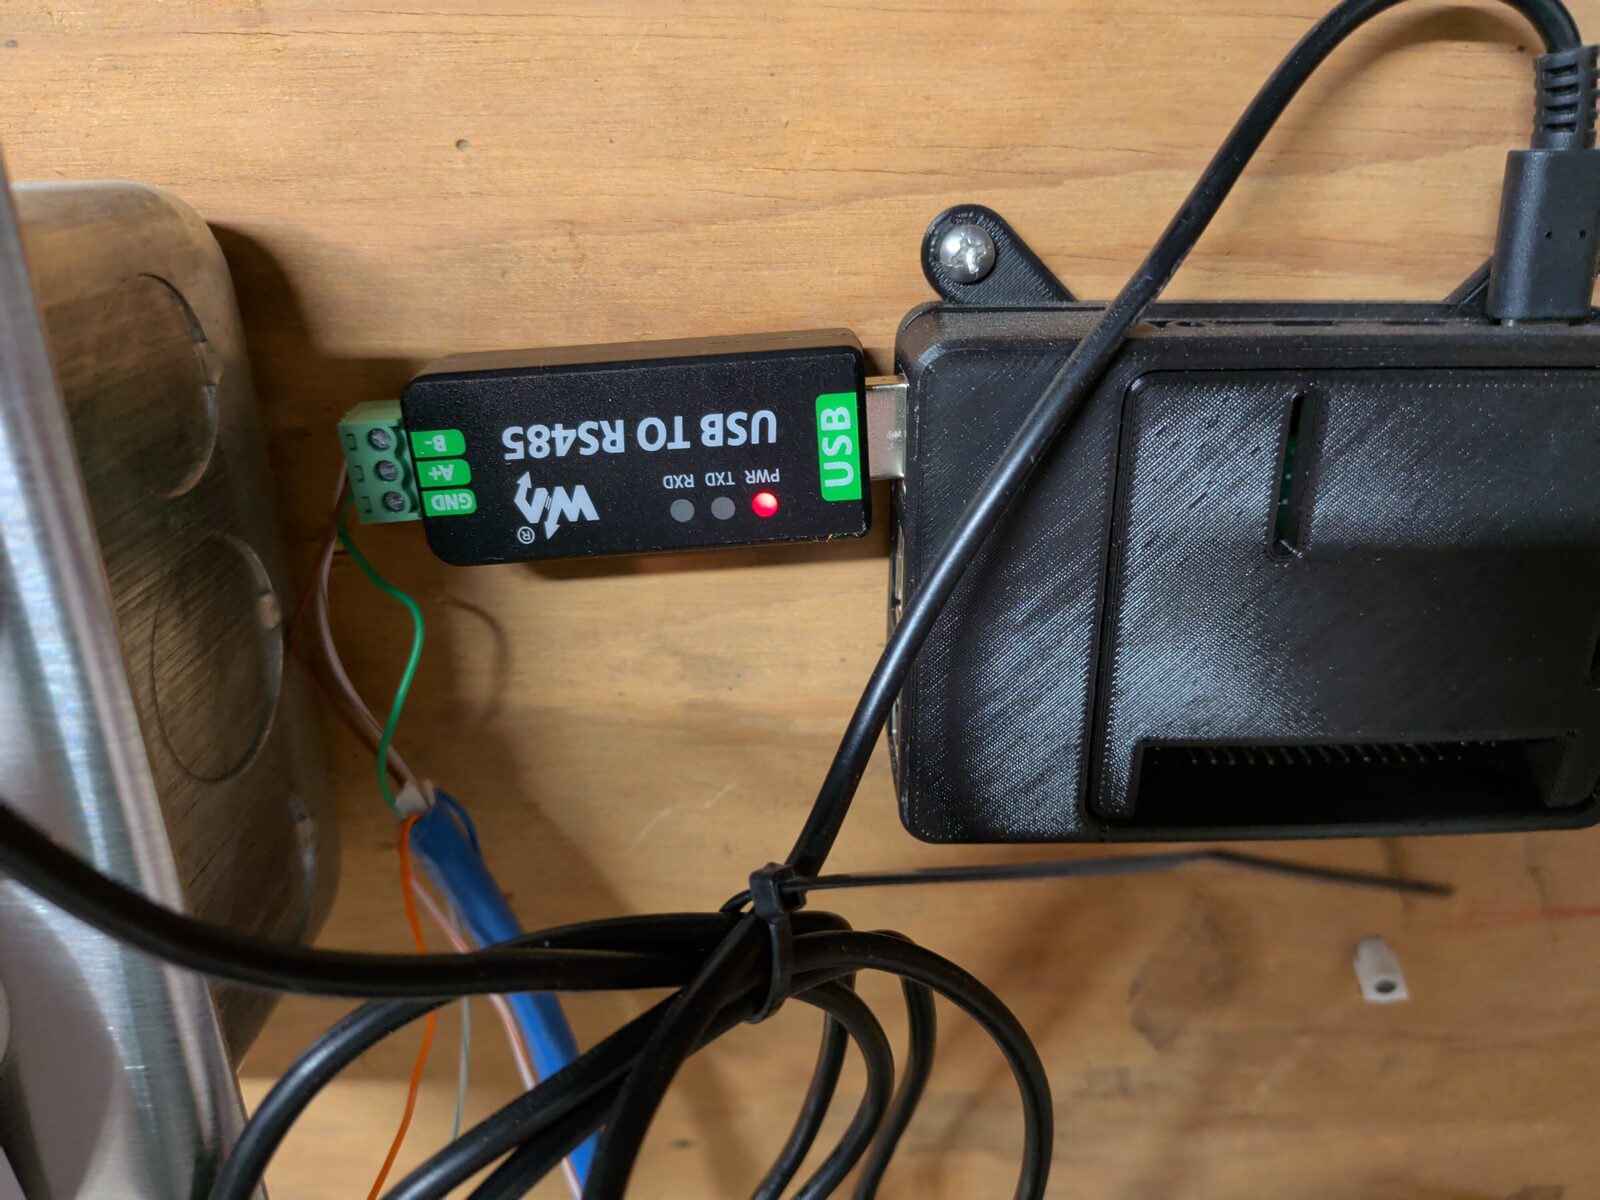
I mounted the Raspberry Pi on the wall within reach of the EG4 6000XP:
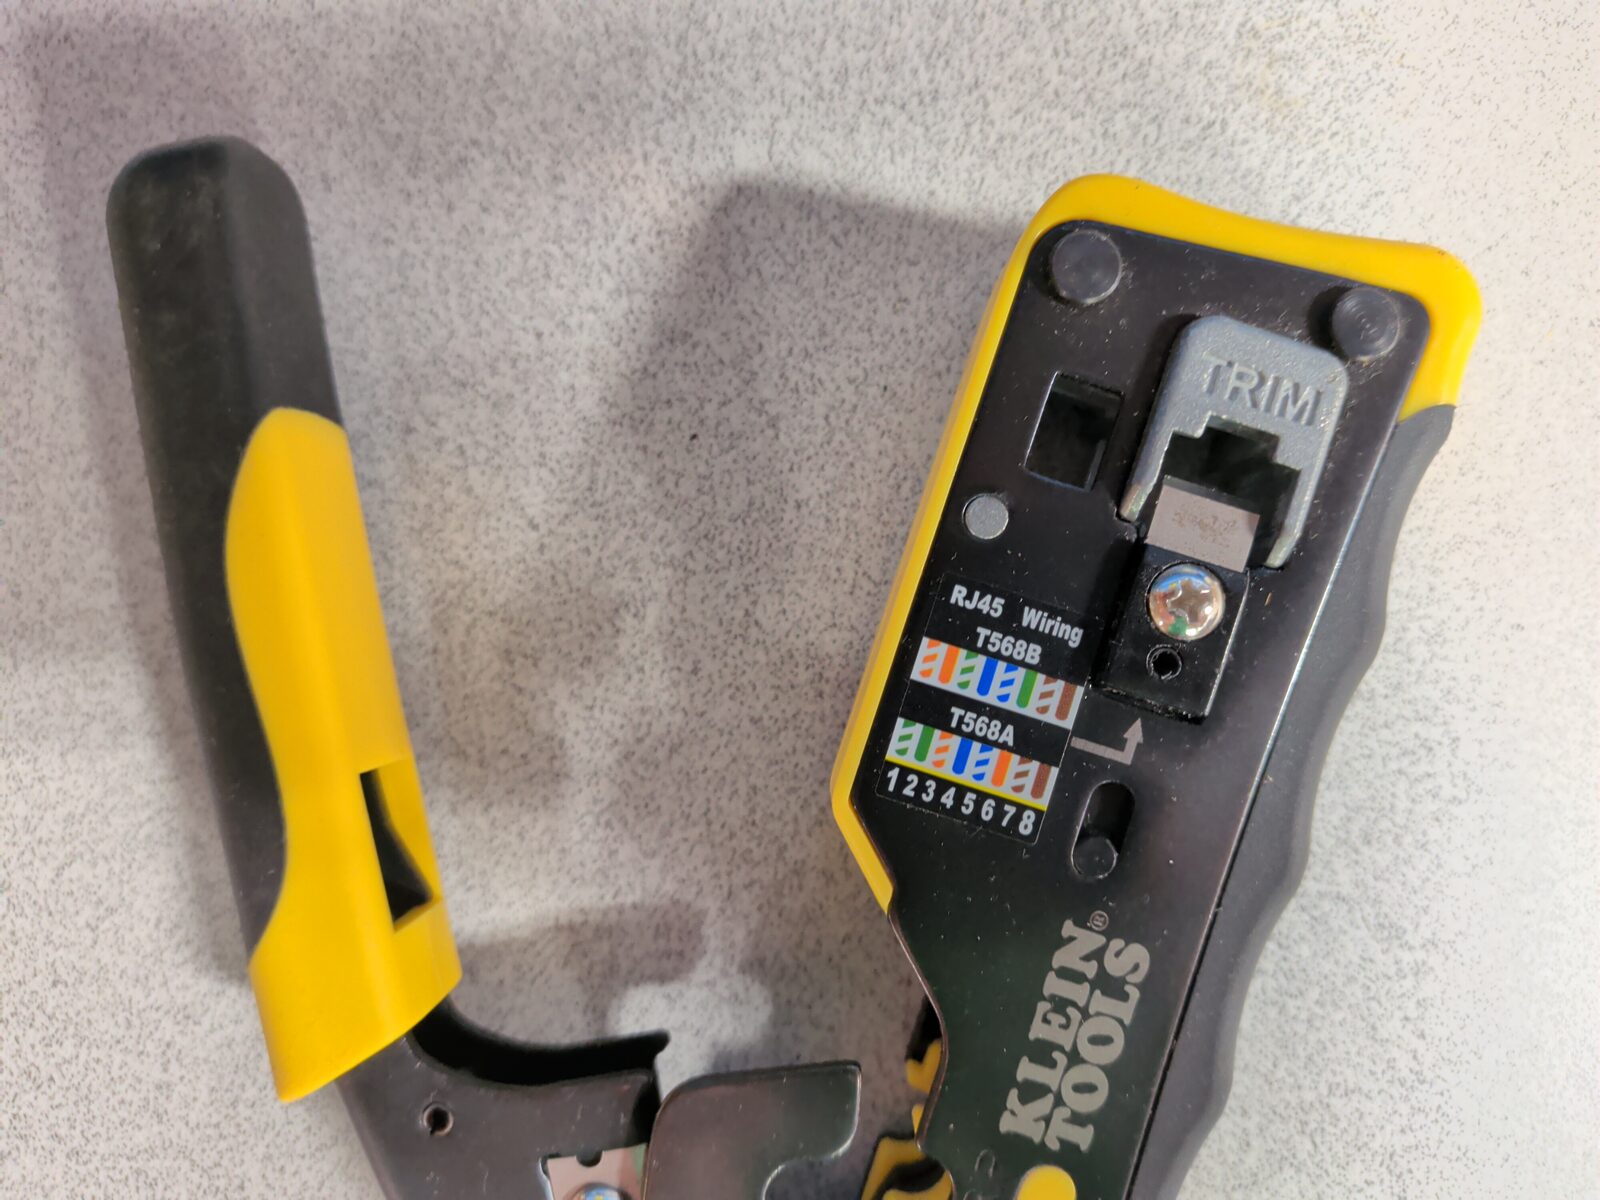
On the connector side, the cable is crimped in standard T568B format. I used Cat6e here, but Cat5 works just as well:
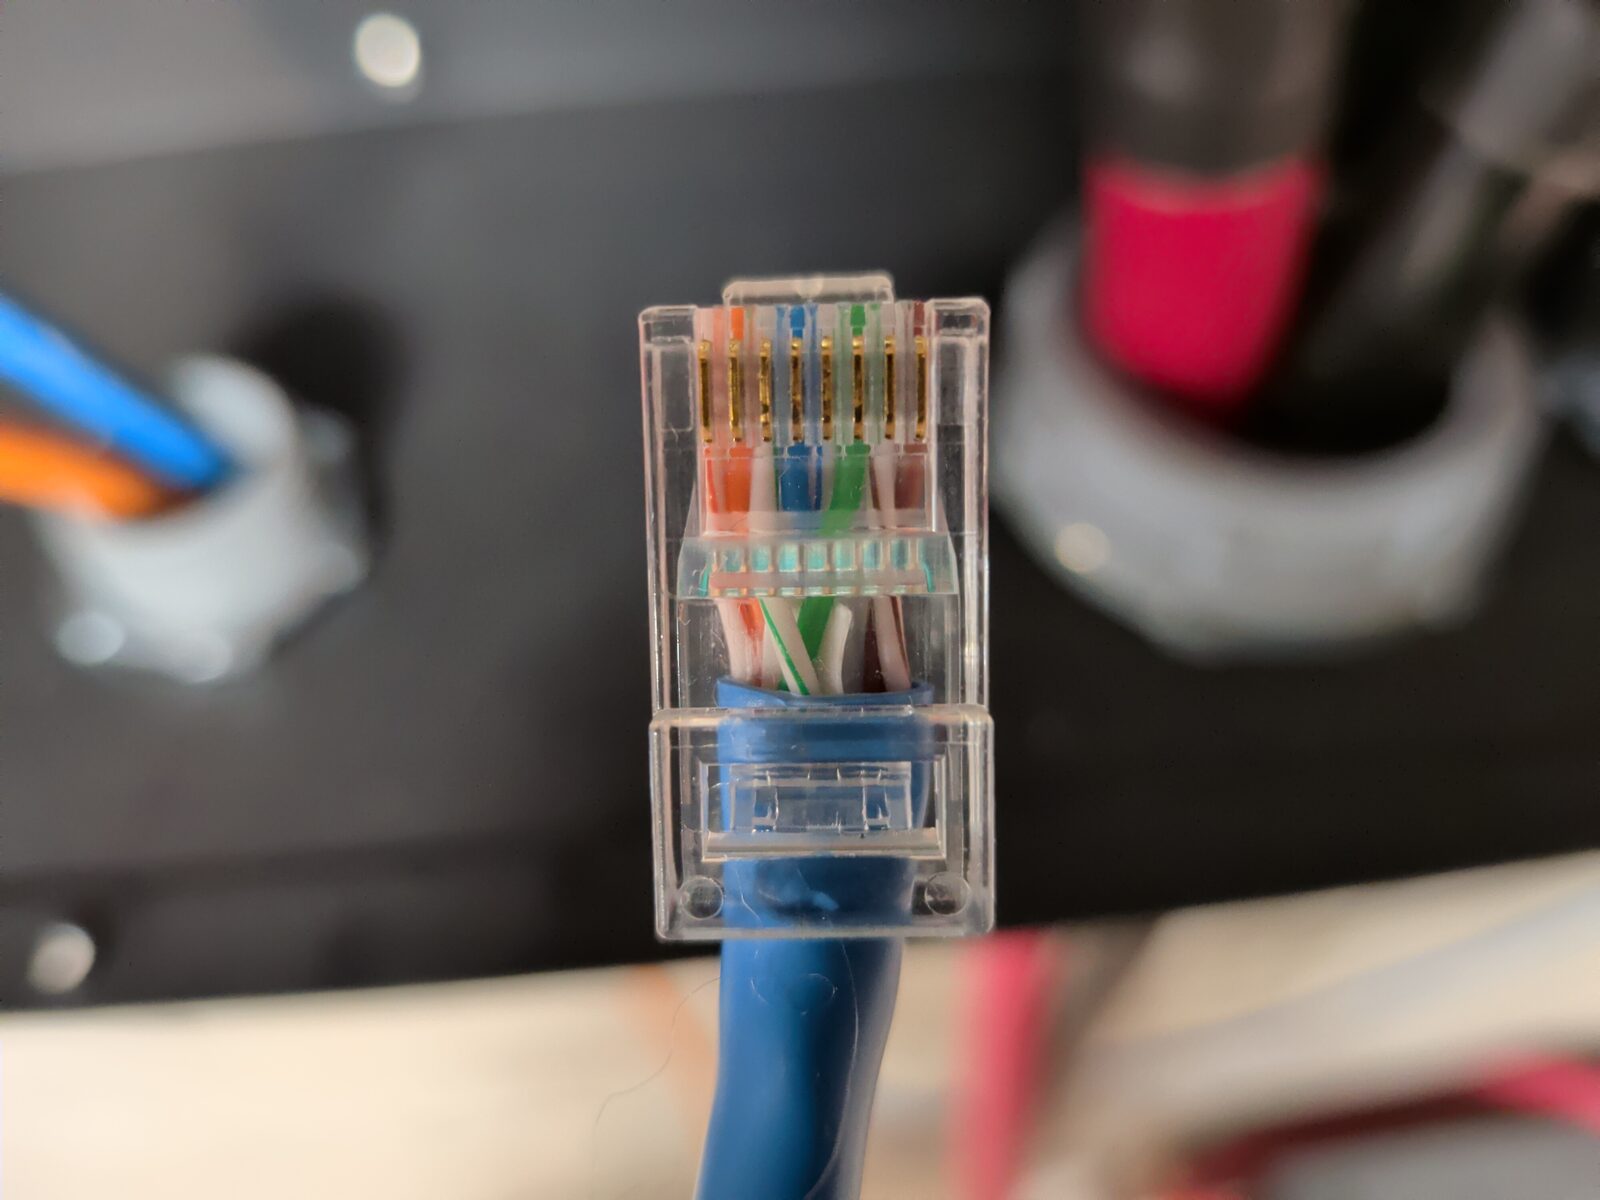
Some crimping tools have the wiring diagram printed on a sticker — like this Klein Tools unit:
The connector plugs into the CT1 port on the inverter (top left). The bottom-left port is for battery BMS communication — don’t confuse the two.
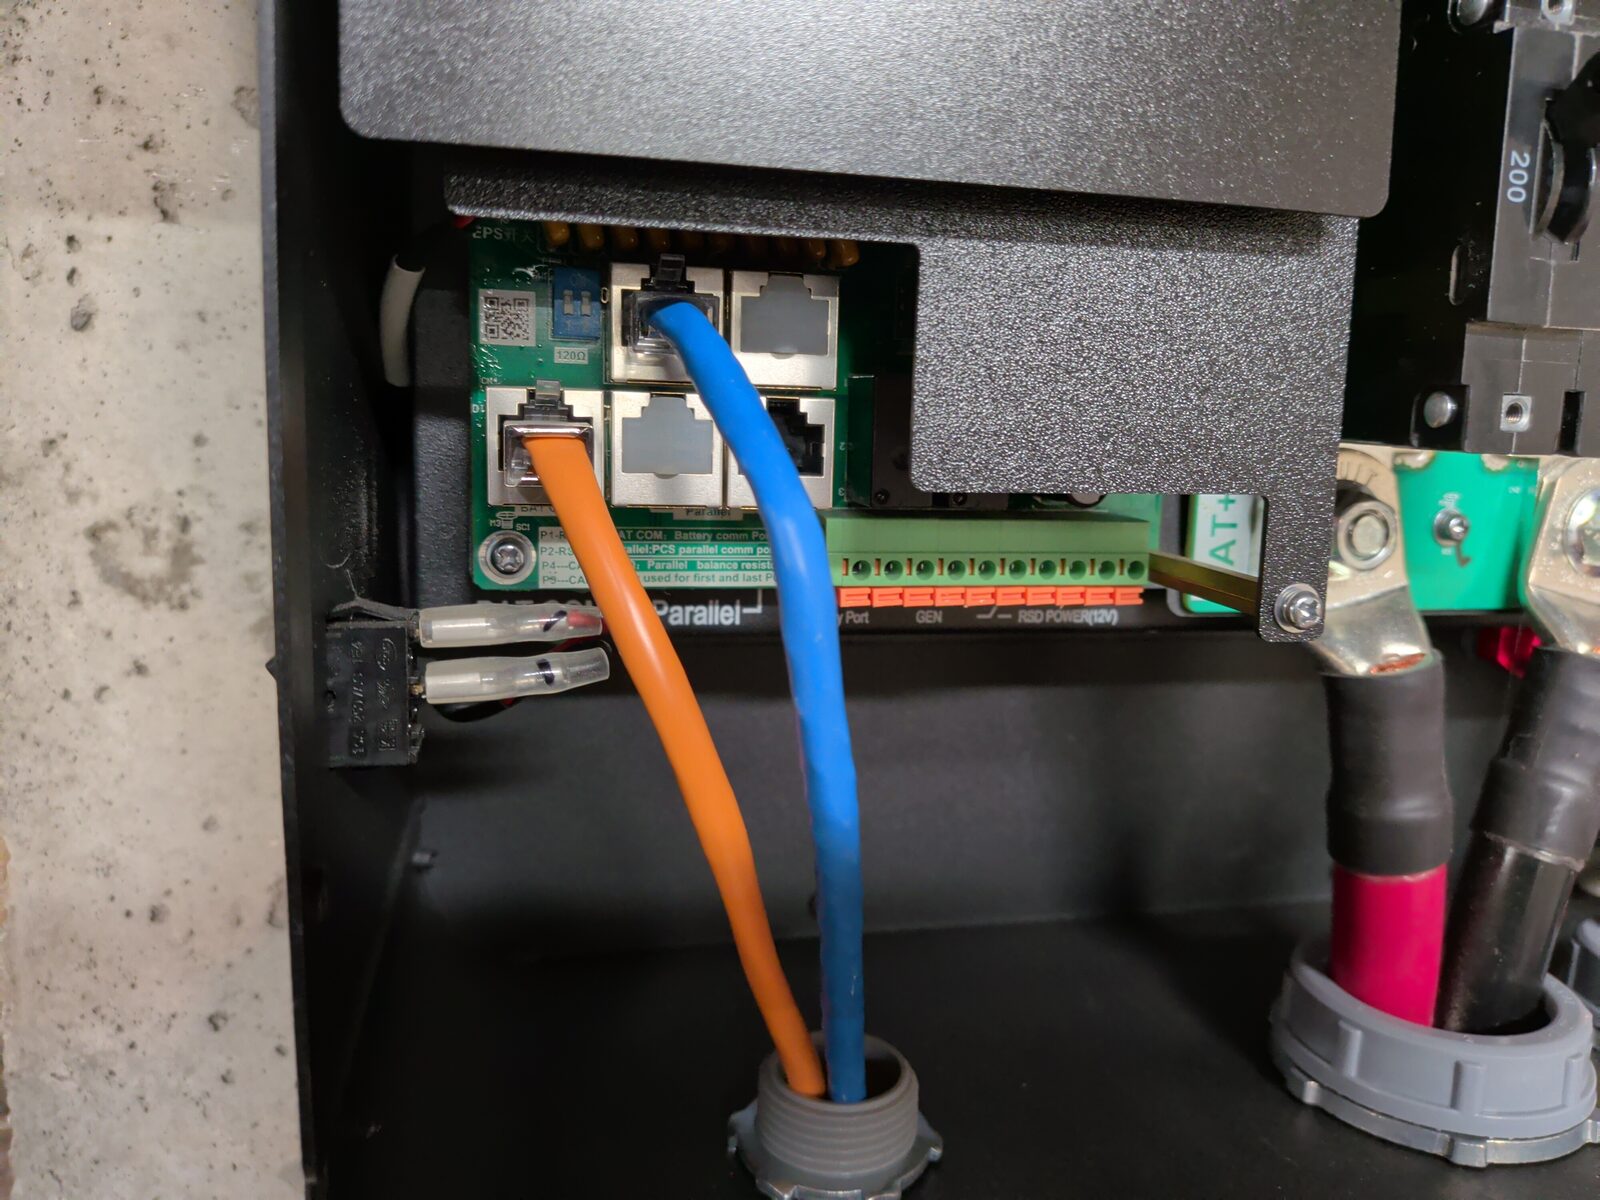
If you have a dongle installed in the CT1 port, remove it before connecting the cable. Once the cable is seated, put the cover back on the inverter. If it’s running, take care not to bump the breakers while re-fitting the cover.
Software Setup
Download a binary
The easiest path is downloading a pre-compiled binary from the Releases page. On a Raspberry Pi, choose the aarch64 build:
tar xzf solar-monitor-v*-aarch64-unknown-linux-gnu.tar.gz
sudo cp solar-monitor /usr/local/bin/
(The binary must live outside /home — the systemd service uses ProtectHome=true.)
Build from source
If you’d rather build from source, clone the repo and build with the embedded web UI:
git clone https://github.com/circuitdojo/solar-monitor.git
cd solar-monitor
(cd web && npm ci && npm run build)
cargo build --release -p solar-monitor --features solar-monitor-api/embed-frontend
sudo cp target/release/solar-monitor /usr/local/bin/
Install the system service
Once the binary is in place, install the systemd service with a single command:
sudo solar-monitor --install
This configures the service to start on boot, with the SQLite database stored at /var/lib/solar-monitor/solar.db. No further setup is required.
Using Solar Monitor
The service listens on port 8080 by default. Navigate to it in your browser:
http://<RPi IP ADDR>:8080
Add a device
Head to the Devices page and click Add Device:
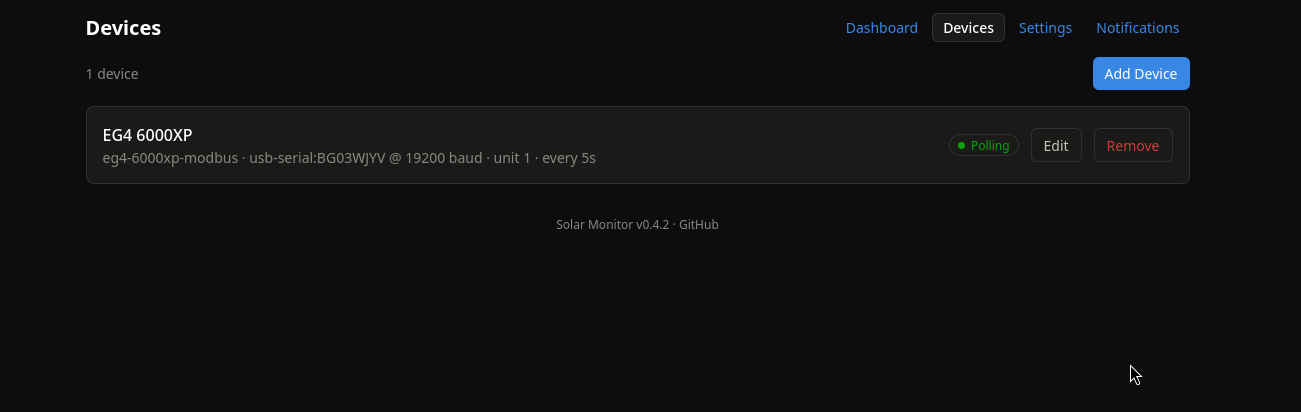
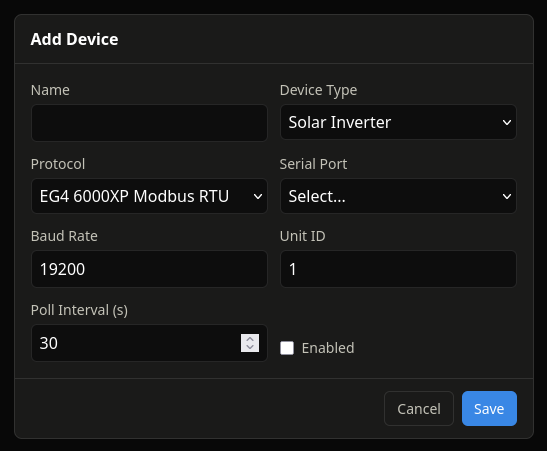
Give the inverter a name and select the serial port for your RS485 adapter (typically /dev/ttyUSB0). Solar Monitor follows the adapter’s serial number, so if you unplug it and plug it back in, the connection resumes automatically.
Dashboard
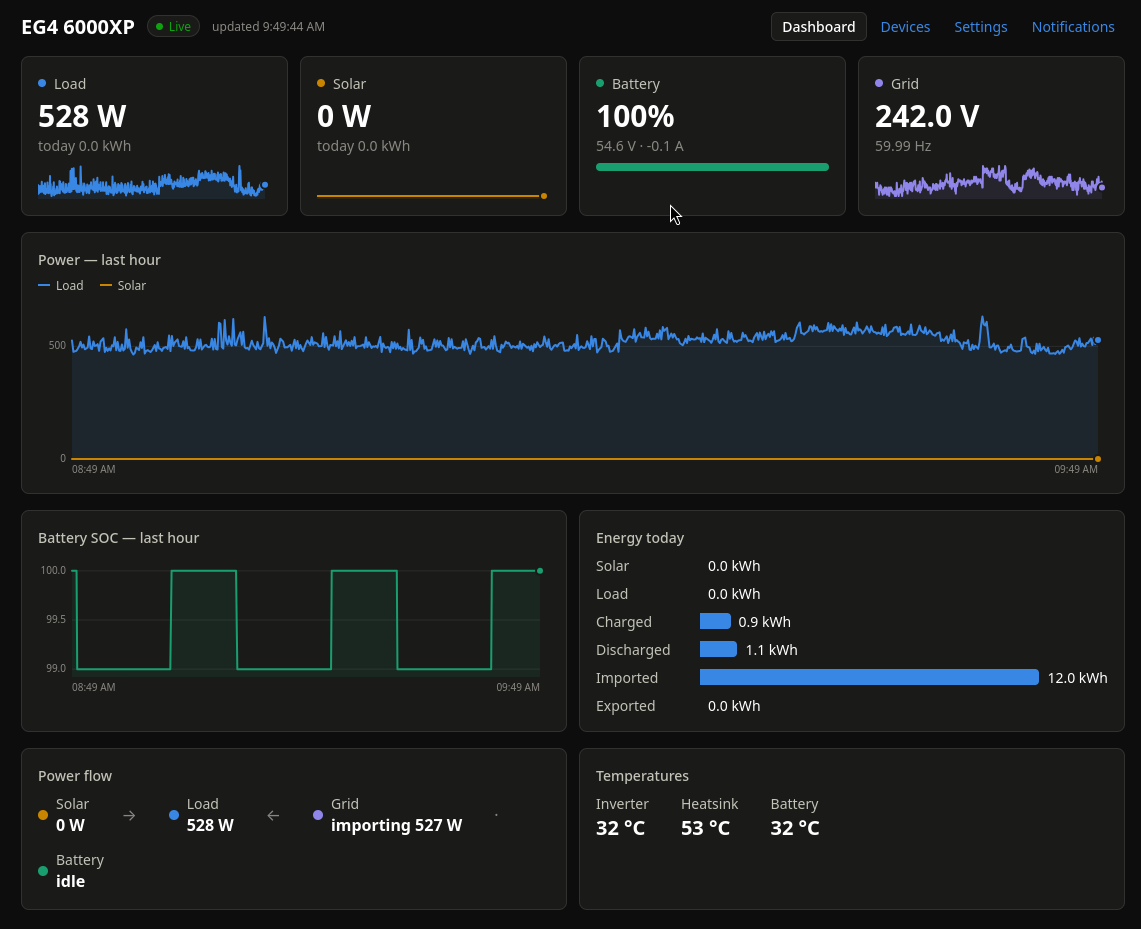
Jump to the Dashboard and you should see live data streaming in — load power, battery state, grid status, and PV production if you have panels connected:
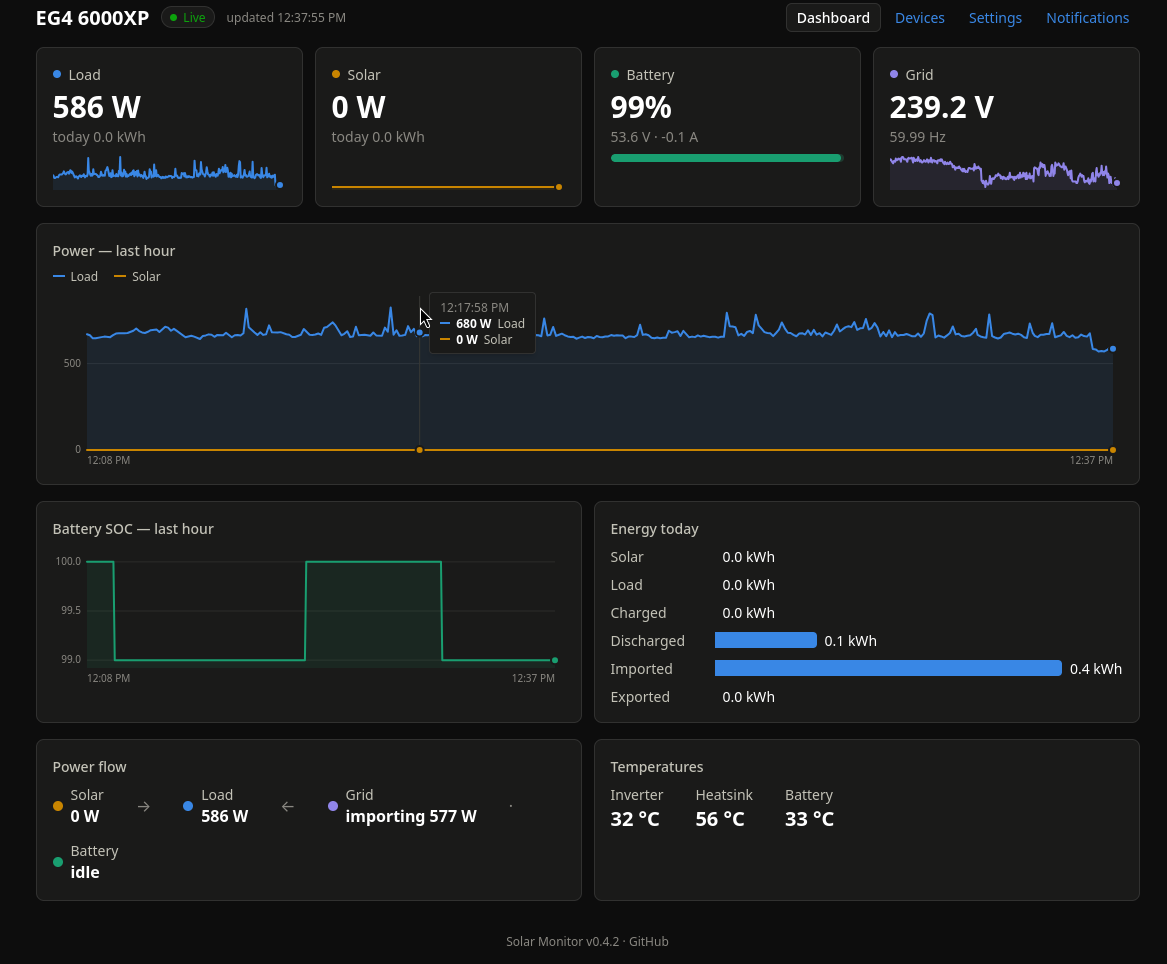
All data is polled from the inverter over Modbus RTU and stored locally in SQLite. The dashboard updates in real time via WebSocket.
Changing settings
Most of the 6000XP’s configurable parameters can be changed from the Settings page:
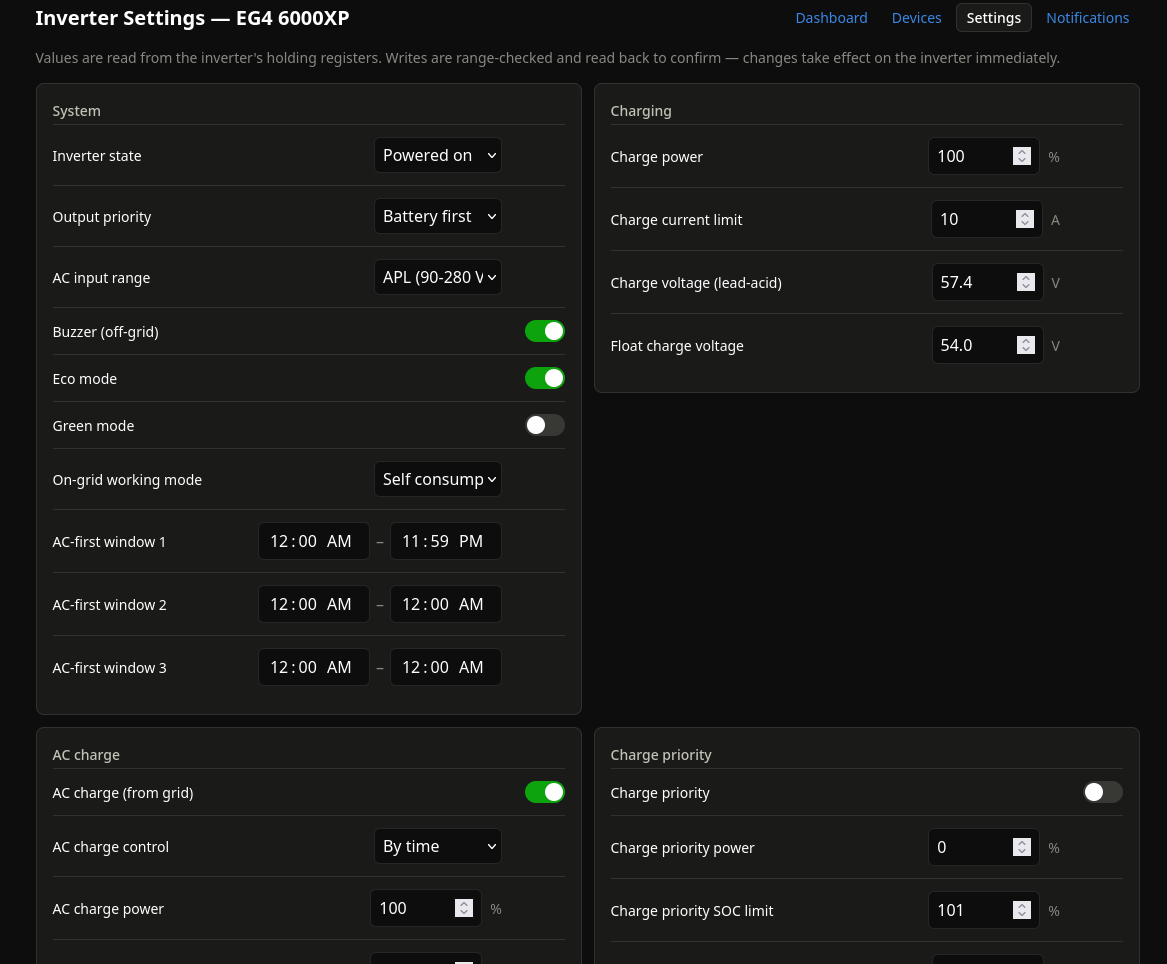
Hardware-risky settings — backup output voltage and frequency, charge voltage, equalization voltage, and inverter standby — show a confirmation dialog before writing. Proceed carefully and verify any change against your inverter’s documentation. We take no liability for damaged equipment.
Notifications
The 6000XP has no native way to alert you when the battery is low or the grid goes down. Solar Monitor fills that gap. Configure a notification channel under Notifications — it supports Pushover, ntfy, email, and generic webhooks:
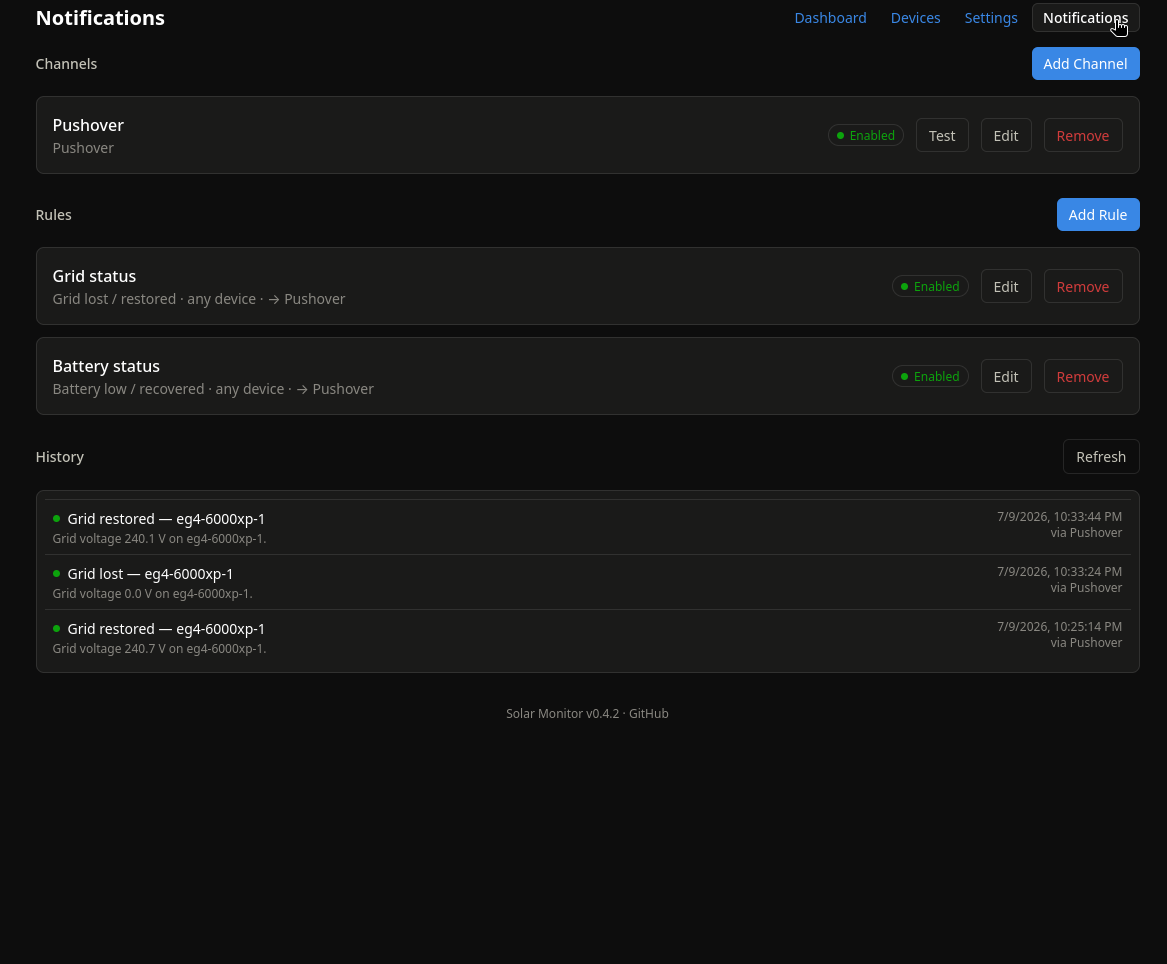
Once a channel is set up, create rules for the conditions you care about. The setup shown here includes rules for a low battery and for changes to the grid’s up/down state.
What’s next
Solar Monitor is still a work in progress. It was built to be expanded to other inverters, batteries, and related equipment.
Everything is open source under GPLv3, and contributions from the community are welcome over on GitHub. Happy solar invertering!